Thermodynamics of Materials Research Lab (TMG)
From TMG
(Difference between revisions)
Ahmadomar82 (Talk | contribs) (→Scanning Electron Microscope (SEM)) |
|||
| (128 intermediate revisions by 8 users not shown) | |||
| Line 1: | Line 1: | ||
| − | The Thermodynamics of Materials | + | <div style="float:right;margin-right:140px;margin-left:50px;width:610px;"> |
| + | The Thermodynamics of Materials research laboratory is located in the <span style="text-decoration: underline;"> </span>[http://www.concordia.ca/about/contact/campus-map/ Sir George Williams Campus] at the heart of downtown Montreal. The experimental facilities and offices are on the 13th floor of the state of the art Engineering ([http://www.concordia.ca/about/contact/campus-map/?markers=maps/markers.php&referer=www.concordia.ca&api=maps.canvas¢ermap=EV EV]) building built in 2005 that features abundant amenities, underground access to the subway and breathtaking view of the Champlain bridge. | ||
| − | == TMRL Research Facilities == | + | [[Image:EV.jpg|center|600px|EV]] <span style="color:#922338;">EV - Engineering and Visual Arts Integrated Complex & John Molson School of Business Buildings</span></div> |
| + | <br/><br/><br/><br/> | ||
| + | == TMRL Research Facilities == | ||
| − | === | + | === Scanning Electron Microscope (SEM) === |
| − | + | ||
| − | + | ||
| − | + | ||
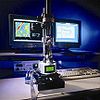
| − | + | Hitachi S-3400N SEM equipped with WDS and EDS systems for elemental analysis (see the [http://users.encs.concordia.ca/~tmg/images/5/51/SEM_Intro.pdf User Guide]) ([http://users.encs.concordia.ca/~tmg/images/b/b3/INCA_Energy.pdf INCA Energy software manual)] | |
| − | + | ||
| − | + | ||
| − | + | ||
| − | + | [[Image:SEM.jpg|thumb|100px]] <br><br><br><br><br><br> | |
| − | [[Image:SEM | + | |
| − | + | ||
| − | + | ||
| − | === | + | === X-Ray Diffractometer === |
| − | + | ||
| − | + | ||
| − | + | ||
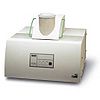
| − | + | [[Image:X-ray diffractometer.jpg|thumb|100px|X-ray diffractometer]] Philips X’Pert Pro Multipurpose X-ray Diffractometer <br><br><br><br><br><br><br><br><br><br> | |
| − | [[Image: | + | |
| − | + | ||
| − | + | ||
| − | === | + | === Ultima 2 ICP === |
| − | + | ||
| − | + | ||
| − | + | ||
| − | + | [[Image:Ultima 2 ICP.jpg|thumb|100px|Ultima 2 ICP]] This is an Optical Emission Spectrometer (OES) ICP. It is used for elemental analysis of material. <br><br><br><br><br><br> | |
| − | [[Image: | + | |
| − | This | + | |
| − | + | ||
| − | === | + | === SEM/EDX === |
| − | + | ||
| − | + | ||
| − | + | ||
| − | + | [[Image:SEM-EDX.jpg|thumb|100px|SEM-EDX]] JEOL 35-cf equipped with EDAX system for elemental analysis <br><br><br><br><br><br> | |
| − | + | === DSC/TGA === | |
| − | + | [[Image:DSCTGA.jpg|thumb|100px|DSCTGA]] SETARAM differential scanning calorimeter equipped with thermogravitometer <br><br><br><br><br><br><br><br><br><br> | |
| − | + | === Thermal Cycling Rig === | |
| − | + | [[Image:Thermal Cycling Rig.jpg|thumb|100px|Thermal Cycling Rig]] This equipment will allow samples to be subjected to long cycles of heating and cooling that accurately simulate thermal conditions within a turbine or a jet engine. <br><br><br><br><br><br><br><br><br><br><br> | |
| − | + | === Planetary Ball Mill === | |
| − | + | [[Image:Planetary Ball mill.gif|thumb|100px|Planetary Ball mill]] This mill is used for mixing, fine grinding and mechanical alloying. <br><br><br><br><br><br><br><br><br><br><br> | |
| − | + | === High-Temp Dynamic Wetting/Spreading === | |
| − | + | [[Image:High temp Dynamic wetting spreading.jpg|thumb|100px|High temp Dynamic wetting spreading]] This machine is suitable for in-situ monitoring of the wetting or spreading behavior of liquid metals on solid substrates. Tests can be run at high temperature (up to 1200°C) and in a very controlled atmosphere (10-7 torr vacuum). <br><br><br><br><br><br><br><br> | |
| − | === | + | === Optical Microscopy === |
| − | + | [[Image:Optical Microscopy.gif|thumb|100px|Optical Microscopy]] Olympus optical microscope <br><br><br><br><br><br><br><br><br> | |
| − | === | + | === Metallographic Sample Preparation Facilities === |
| − | + | [[Image:Metallographic sample preparation facilities.jpg|thumb|100px|Metallographic sample preparation facilities]] Grinding, polishing, mounting, etching.. etc. <br><br><br><br><br><br><br><br><br> | |
| − | === | + | === Furnaces === |
| − | + | [[Image:Furnaces.jpg|thumb|100px|Furnaces]] We have furnaces suitable for sample preparation and heat treatment. <br><br><br><br><br><br><br> | |
| − | == Other avaliable Research Facilities for TMG == | + | === Arc Melting Furnace === |
| + | |||
| + | [[Image:Arc melting Furnace.jpg|thumb|100px|Arc melting Furnace]] This is a home-made small arc melting furnace suitable for preparing small samples (button samples) for studying phase diagrams or other purposes. <br><br><br><br><br><br><br><br><br><br> | ||
| + | |||
| + | === Levitation Melting Furnace === | ||
| + | |||
| + | [[Image:Levitation melting Furnace.jpg|thumb|100px|Levitation melting Furnace]] This is a home-made furnace which enables melting of small quantities of materials in a controlled atmosphere. <br><br><br><br><br><br><br><br><br><br> | ||
| + | |||
| + | === Diffusion Couples and Quartz Tubes Sealing Facilities === | ||
| + | |||
| + | [[Image:Diffusion couples and quartz tubes sealing facilities.jpg|thumb|100px|Diffusion couples and quartz tubes sealing facilities]] <br><br><br><br><br><br><br><br> | ||
| + | |||
| + | === Micro Hardness === | ||
| + | |||
| + | [[Image:Micro hardness.gif|thumb|100px|Micro hardness]] Vicker’s micro-hardness tester. <br><br><br><br><br><br><br><br><br><br> | ||
| + | |||
| + | === PCTSYS (~PCTPro-2000) === | ||
| + | |||
| + | [[Image:PCTPRO.jpg|thumb|100px|PCTPRO]] This instrument is for measuring gas sorption properties of materials. It is particularly suited for hydrogen sorption measurements to aid in the development of hydrogen storage and metal hydride battery materials. PCT stands for Pressure Composition Temperature. <br><br><br><br><br><br><br><br><br> | ||
| + | |||
| + | === Thermal Coating === | ||
| + | |||
| + | [[Image:Plasma Spray.jpg|thumb|100px|Plasma Spray]] Plasma and HVOF systems have been acquired <br><br><br><br><br><br><br> | ||
| + | |||
| + | === Low Electrical Resistivity Measurements for Phase Transformation Measurements === | ||
| + | |||
| + | [[Image:Resistivity Apparatus.jpg|thumb|100px|Resistivity Apparatus]] This instrument measures up to nΩ*m range resistivity changes in metallic samples using the 4 point method for temperatures up to 650C. The equipment can be used for isothermal aging precipitation measurements, metallic glass crystallization, phase transformation study and many more applications. <br><br><br><br><br><br><br><br><br><br> | ||
| + | |||
| + | === 1600ºC Oxynitriding Furnace === | ||
| + | [[Image:1600_MTI_Furnace.jpg|thumb|100px|Oxynitriding Furnace]] This is a tube furnace equiped with a molecule pump and a two-inlet gas mixing system. Its maximum temperature is 1600ºC.<br><br><br><br><br><br><br><br><br><br> | ||
| + | |||
| + | === Erosion rig === | ||
| + | |||
| + | [[Image:Water erosion rig.jpg|thumb|100px|Erosion rig]] Liquid impingement erosion tests can be done using this facility at two different speed ranges, low speed (up to 340 m/s) and high speed (up to 500m/s). The unique high speed specification and the possibility of monitoring process using high speed cameras in this facility can be very useful to better understanding of this failure mechanism. <br><br><br><br><br><br> | ||
| + | |||
| + | === Low Plasticity Burnishing=== | ||
| + | [[Image:Burnishing machine.jpg|thumb|100px|LPB]] Low plasticity burnishing (LPB) is a method of metal improvement that provides deep, stable surface compressive residual stresses with little cold work for improved damage tolerance and metal fatigue life extension. Improved fretting fatigue and stress corrosion performance has been documented, even at elevated temperatures where the compression from other metal improvement processes relax. The resulting deep layer of compressive residual stress has also been shown to improve high cycle fatigue (HCF) and low cycle fatigue (LCF) performance. <br><br><br><br><br><br> | ||
| + | |||
| + | === Water Jet Cutting Machine=== | ||
| + | [[Image:Water Jet Cutting Machine.jpg|thumb|100px|Water Jet Cutting Machine]] The water jet cutting machine is equipped with high pressure water cutting system that might generate 380 MPa water pressure. Mixed with the abrasive sand, the water jet cutting machine can cut most of the materials, including wood, plastics, metals, ceramics, glasses with very high speed. The machine is controlled by CNC system, the accuracy of this machine ± 0.2mm. <br><br><br><br><br><br> | ||
| + | |||
| + | === RS-200 Milling Guide(Coming soon) === | ||
| + | [[Image:Rs_200.jpg|thumb|100px|RS-200 Milling Guide]] The RS-200 Milling Guide(Vishay Precision Group) is a precision fixture for accurate positioning and drilling of a hole through the center of special strain gage rosettes used for determination of residual stresses by the blind hole drilling method. <br><br><br><br><br><br><br><br><br><br> | ||
| + | |||
| + | == Other avaliable Research Facilities for TMG == | ||
We have access to the following materials research related facilities available at the Mechanical Engineering Department of Concordia University. | We have access to the following materials research related facilities available at the Mechanical Engineering Department of Concordia University. | ||
| − | === Mechanical Testing === | + | === Mechanical Testing === |
| − | Various mechanical testing equipment such as uni-axial and bi-axial tensile testers, hardness, impact toughness.. etc. | + | [[Image:Mechanical Testing.jpg|thumb|100px|Mechanical Testing]] Various mechanical testing equipment such as uni-axial and bi-axial tensile testers, hardness, impact toughness.. etc. <br><br><br><br><br><br><br><br> |
| − | === Atomic Force | + | === Atomic Force Microscope === |
| − | This Digital Instrument Multimode system allows relatively high temperature measurements up to 250°C. | + | [[Image:Atomic Force microscope.jpg|thumb|100px|Atomic Force microscope]] This Digital Instrument Multimode system allows relatively high temperature measurements up to 250°C. <br><br><br><br><br><br><br><br><br> |
| − | === Mechanical Properties of Nano-Materials === | + | === Mechanical Properties of Nano-Materials === |
| − | Nanoindenter and Nano-Bionix MTS | + | [[Image:Mechanical Properties of Nano-Materials.jpg|thumb|100px|Mechanical Properties of Nano-Materials]] Nanoindenter and Nano-Bionix MTS <br><br><br><br><br><br><br> |
| − | === Thermal Properties === | + | === Thermal Properties === |
| − | Laser-Flash method | + | [[Image:Thermal Properties.jpg|thumb|100px|Thermal Properties]] Laser-Flash method |
Latest revision as of 15:54, 20 March 2015
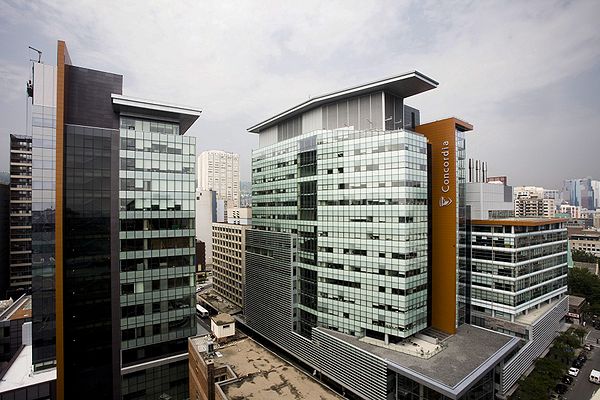
The Thermodynamics of Materials research laboratory is located in the Sir George Williams Campus at the heart of downtown Montreal. The experimental facilities and offices are on the 13th floor of the state of the art Engineering (EV) building built in 2005 that features abundant amenities, underground access to the subway and breathtaking view of the Champlain bridge.
EV - Engineering and Visual Arts Integrated Complex & John Molson School of Business Buildings
TMRL Research Facilities
Scanning Electron Microscope (SEM)
Hitachi S-3400N SEM equipped with WDS and EDS systems for elemental analysis (see the User Guide) (INCA Energy software manual)
X-Ray Diffractometer
Philips X’Pert Pro Multipurpose X-ray DiffractometerUltima 2 ICP
This is an Optical Emission Spectrometer (OES) ICP. It is used for elemental analysis of material.SEM/EDX
JEOL 35-cf equipped with EDAX system for elemental analysisDSC/TGA
SETARAM differential scanning calorimeter equipped with thermogravitometerThermal Cycling Rig
This equipment will allow samples to be subjected to long cycles of heating and cooling that accurately simulate thermal conditions within a turbine or a jet engine.Planetary Ball Mill
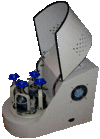
This mill is used for mixing, fine grinding and mechanical alloying.High-Temp Dynamic Wetting/Spreading
This machine is suitable for in-situ monitoring of the wetting or spreading behavior of liquid metals on solid substrates. Tests can be run at high temperature (up to 1200°C) and in a very controlled atmosphere (10-7 torr vacuum).Optical Microscopy
Olympus optical microscopeMetallographic Sample Preparation Facilities
Grinding, polishing, mounting, etching.. etc.Furnaces
We have furnaces suitable for sample preparation and heat treatment.Arc Melting Furnace
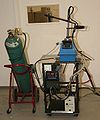
This is a home-made small arc melting furnace suitable for preparing small samples (button samples) for studying phase diagrams or other purposes.Levitation Melting Furnace
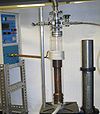
This is a home-made furnace which enables melting of small quantities of materials in a controlled atmosphere.Diffusion Couples and Quartz Tubes Sealing Facilities
Micro Hardness
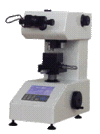
Vicker’s micro-hardness tester.PCTSYS (~PCTPro-2000)
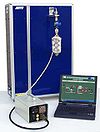
This instrument is for measuring gas sorption properties of materials. It is particularly suited for hydrogen sorption measurements to aid in the development of hydrogen storage and metal hydride battery materials. PCT stands for Pressure Composition Temperature.Thermal Coating
Plasma and HVOF systems have been acquiredLow Electrical Resistivity Measurements for Phase Transformation Measurements
This instrument measures up to nΩ*m range resistivity changes in metallic samples using the 4 point method for temperatures up to 650C. The equipment can be used for isothermal aging precipitation measurements, metallic glass crystallization, phase transformation study and many more applications.1600ºC Oxynitriding Furnace
This is a tube furnace equiped with a molecule pump and a two-inlet gas mixing system. Its maximum temperature is 1600ºC.Erosion rig
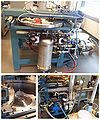
Liquid impingement erosion tests can be done using this facility at two different speed ranges, low speed (up to 340 m/s) and high speed (up to 500m/s). The unique high speed specification and the possibility of monitoring process using high speed cameras in this facility can be very useful to better understanding of this failure mechanism.Low Plasticity Burnishing
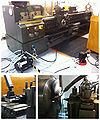
Low plasticity burnishing (LPB) is a method of metal improvement that provides deep, stable surface compressive residual stresses with little cold work for improved damage tolerance and metal fatigue life extension. Improved fretting fatigue and stress corrosion performance has been documented, even at elevated temperatures where the compression from other metal improvement processes relax. The resulting deep layer of compressive residual stress has also been shown to improve high cycle fatigue (HCF) and low cycle fatigue (LCF) performance.Water Jet Cutting Machine
The water jet cutting machine is equipped with high pressure water cutting system that might generate 380 MPa water pressure. Mixed with the abrasive sand, the water jet cutting machine can cut most of the materials, including wood, plastics, metals, ceramics, glasses with very high speed. The machine is controlled by CNC system, the accuracy of this machine ± 0.2mm.RS-200 Milling Guide(Coming soon)
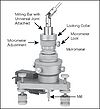
The RS-200 Milling Guide(Vishay Precision Group) is a precision fixture for accurate positioning and drilling of a hole through the center of special strain gage rosettes used for determination of residual stresses by the blind hole drilling method.Other avaliable Research Facilities for TMG
We have access to the following materials research related facilities available at the Mechanical Engineering Department of Concordia University.
